Sunday, October 12, 2014

X-COM gameplay news

News for October 2014
The Desperate Defense
How to Turn Back the Alien Invasion of XCOM: The Board Game
XCOM: The Board Game | Published 10 October 2014
As their transport rumbled into position, the soldiers locked their armor into place and fired up their battle scanners. One last check of their plasma rifles, and they would rush out the door, into the beating heart of the alien invasion. They knew they wouldn’t all make it back, but if they failed, billions more might die. The whole human race might perish. Live or die, there was no turning back…
Just in case you thought it was going to be easy to win your war against the alien invaders of XCOM: The Board Game, think about this: There are two ways to lose the game, but only one way to win it…
In our last preview, we looked at the game’s free digital companion app. Integral to your XCOM experience, this app allows us to push the game’s design well beyond what would be possible without it. And it coordinates the alien invasion.
There are five different invasion plans, which we’ll explore in more depth in a later preview, but all of them share three common elements: UFOs, enemies, and crises. These are the invaders’ weapons as they strike against you. With these weapons, they hope to sow chaos, topple nations, and cause the collapse of human civilization.
Early military interventions proved ineffectual, and you – and XCOM – are now humanity’s last hope for a successful resistance. It is your job to maintain a semblance of order, to slow the descent into utter panic, and to find a way to strike at the invaders where it counts.
These duties drive the game’s victory and loss conditions:
  • You lose if two continents fall into panic. Not only does this mean that many hundreds of millions of people are dying, it means that your team loses its funding and XCOM shuts down.
  • You lose if your base is destroyed. If your base is destroyed, so are your means of fighting back. And if XCOM can’t fight back, there’s no other power in the world capable of retaliating in any way that doesn’t harm the world more than its invaders.
  • You win if you can unlock and complete your scenario’s final mission. Of course, to get to the final mission, you’ll need to protect your base, prevent nations from panicking, and complete other missions that will help you find weaknesses in the aliens’ strategy.

Can you unlock your final mission? Click on the image above to unlock Domination.
Don’t Panic!
Because you’ll lose if any two of the six populated continents fall into panic, you’ll need to become familiar with the panic track. As you wage your war against the alien invaders, you’ll need to track the degree to which each continent has fallen into chaos.
Time is against you. After all, your team wasn’t fully activated until the world’s military forces had already lost ground to the invaders. Thus, even at the beginning of the game, you’ll find that some of the continents have moved one or more steps along the panic track. Once you start playing, the pressure really starts to build. Each round, the world’s continents each move one step closer toward panic for each UFO in orbit over that continent. As if that’s not enough, the crises you must resolve may also move the world’s continents toward panic.

While XCOM’s Interceptors are deployed elsewhere, two UFOs sow chaos in Australia, moving it two steps toward panic. Asia has already fallen into panic, so if Australia also collapses, the game is over, and you lose!
It’s almost impossible for you to entirely staunch the spread of panic. The best you can hope for is that you can slow it down, aid those nations that truly need your intervention, and buy yourself just enough time to plan a retaliatory strike.
Defend Your Base
As you route your Interceptors across the globe to confront the UFOs that threaten to topple the world’s governments, the aliens send a number of enemies to assault your base, hoping to find some way to eliminate you and the threat that your team represents to their grand design.
In XCOM: The Board Game, there are nine different types of enemy cards, corresponding to each of the different types of enemies that might assault your base. At the beginning of your game, the app will identify a number of these enemies and instruct you to take all of their cards, including any Elite versions, and shuffle them together to create an enemy deck.
These enemies then spawn at your base throughout the game, and if your soldiers can’t eliminate them all, each enemy remaining deals one damage to your base. If your base suffers enough damage, it is destroyed, and you lose.

Two enemies survive XCOM’s defenses, damaging the base twice.
However, your base defense isn’t all-or-nothing. Even if your base isn’t at risk of being destroyed, you can suffer some very real consequences for letting the enemy strike. Whenever the base damage token advances to a red space, you must resolve the damage ability on the aliens’ invasion plan.

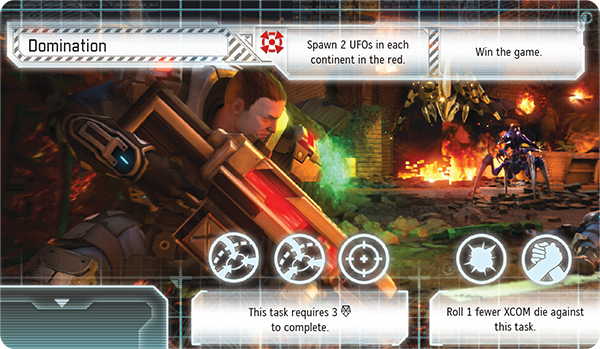
The damage token advances to a red space, triggering the damage ability on the aliens’ invasion plan. In this example, two UFOs spawn on each continent in the red zone of the panic track.
We will look at base defense in greater detail in a later preview.
The Final Mission
As UFOs appear in orbit and enemies spawn on your base, you’ll be forced to decide how best to allocate your resources. They are finite, after all, and the key to XCOM: The Board Game is deciding which battles you need to win, and which sacrifices you can afford to make.
As much as this is a game of tense struggles against strange and remorseless foes, it is a game of resource management. Interceptors cost money. Soldiers cost money. Scientists cost money. Satellites cost money. And your funds are limited. You need to weigh your options clearly and quickly, even in the face of disaster.

Your team has thirteen credits… You need to make them count!
But if you can help the world’s governments retain a semblance of order long enough, and if you can keep the enemies from destroying your base and all your work, you just might be able to send a hand-picked unit of soldiers to undertake one final, surgical strike against the aliens that may hit them hard enough that you can turn the tides of war.

XCOM’s squad leader sends a squad of two assault soldiers and one sniper to attempt the game’s final mission. Both types of soldiers excel at the early tasks, though they may need to push hard to make it through the mission’s third task.
Moreover, you can undertake other missions throughout the game to find weaknesses in the aliens’ invasion plan. By completing these other missions, you reduce the amount of time it takes your analysts to discover the target of your final mission.
Both these preliminary missions and the final mission require that you complete a number of tasks, but there’s certainly no guarantee you’ll resolve them successfully on the first attempt, nor on the second, or the third. In fact, there’s a good chance that when you send your best soldiers to a mission, you’re sending them to their doom.

Open task slots on missions are filled by enemies. Completing this final mission requires that you get one success on the first task, then get three successes on the second task, and finally manage to get one last success on the third task.
Prevail Against Overwhelming Odds
The odds of XCOM: The Board Game are stacked against you. There are two ways to lose and only one way to win. By the time your team gets funding, the aliens have already launched their invasion. You need to fight your war on four fronts, but you don’t have enough funding to fight on even footing at each.
Out of this situation, you must carve a winning plan. You need to shoot down UFOs to slow the rise of panic. You need to fight for your base. You need to research new tech to gain footing. You need to send soldiers on deadly missions to gain crucial military intelligence. It’s a desperate situation, and it requires bold action. The question is: How far will you push your luck?
In our next preview, we’ll look at the game’s push-your-luck dice mechanics in conjunction with your base defense, the role of the Squad Leader, and the resolution of missions!

XCOM: The Board Game is a cooperative board game of global defense for one to four players. As unknown alien invaders press their attack against the earth, you and up to three friends serve as the department heads of XCOM, an elite, international military organization. You must destroy UFOs, research alien technology, complete critical missions, and find some way to prevent the collapse of human civilization. You are humanity's last hope.

Saturday, October 11, 2014

More Star Wars Armada News

News for October 2014
Capital Ships in Battle
Preview the Combats of STAR WARS (TM): Armada
Star Wars: Armada | Published 10 October 2014
“Move as close as you can and engage those Star Destroyers at point-blank range.”
    –Lando Calrissian
The battles of Star Wars™: Armada are about as large as battles get. Rebel and Imperial fleets collide above Outer Rim planets or outside of asteroid fields. Star Destroyers and Rebel frigates exchange turbolaser fire as screens of TIEs swarm X-wings and Corellian corvettes. The fate of the galaxy hangs in the balance.
As large as the space battles of Armada are, they flow seamlessly over six rounds, each of which is divided into four phases. In our last preview, we looked at the Command Phase and how it forces you to plan for the future, even as you respond to the changing tides of battle. Larger ships are more powerful, though less responsive, and while they’re capable of resolving more commands within a single round, they force you to plan further ahead. A single round of combat may be the culmination of three or four rounds of planning.
When the moment comes to fire, then, you’ll want to be sure to make it counts. In today’s preview, we’ll look more closely at the Ship Phase, focusing on ship-to-ship combat and its brutal exchanges of turbolaser blasts and artillery fire.
The Ship Phase
In Armada, after you and your opponent have selected all your commands and placed them on the bottom of your ships’ command stacks, you proceed to the Ship Phase, in which you and your opponent take turns activating your ships one at a time.
When it’s your turn, you can choose any of your capital ships that has not already activated during the round and activate it. Each activation has three steps: Reveal Command Dial, Attack, and Execute Maneuver.

1. Reveal Command Dial

Once you select which of your ships you intend to activate, you reveal the top command from its command stack and place the dial faceup next to your ship. If you want to resolve the command from the dial for its full effect, you can do so at the appropriate time. Otherwise, you can spend the command to gain the matching command token and place it next to your ship.

The Imperial player reveals a navigate command from the top of a
Victory I-class Star Destroyer’s command stack.

2. Attack

After you reveal your ship’s command dial, your ship can perform up to two attacks, though each must originate from a different hull zone. Each attack can target a single hull zone on an enemy ship or one or more enemy squadrons. We’ll look at how your ship resolves its attacks in more detail below.

Few things in the galaxy are deadlier or more terrifying than direct fire from an Imperial Star Destroyer!

3. Execute Maneuver

After your ship performs its attacks, it executes a maneuver. Using the game’s articulated maneuver tool, you must move your ship a distance corresponding to its current speed, tracked on its speed dial.
Notably, your ship’s movement is based upon its speed. Each ship’s card features a speed chart that indicates the number of steps you can adjust the maneuver tool’s yaw at each joint, and the only way to adjust your ship’s speed is to resolve a navigate command.

A Nebulon-B frigate uses the game’s maneuver tool to set its course for a four-speed maneuver, adjusting the template one click right at the second joint and two clicks left at the third joint.
After you finish executing your ship’s maneuver, you place its command dial faceup on its ship card, and your opponent can activate a ship.
Maximum Firepower
As mentioned earlier, each of your ships can perform up to two attacks when it activates, and getting the most out of these attacks is crucial to your success. As a result, it’s vital that you understand how to create the best possible pool of attack dice, anticipate your opponent’s defenses, and learn to position your ships to anticipate their attacks in the next round.
The strength of your attack is represented by its pool of attack dice. There are three types of color-coded, eight-sided attack dice, and each corresponds to a different maximum firing range, as indicated on the game’s range ruler.

Colored icons indicate which types of dice can fire at a given range. All three dice can fire at close range while only the red dice can fire at long range.
Red dice have the longest range, though they are the least accurate. Only five of their sides result in hits () or critical hits (), although only two of their sides are blank. The final side has an accuracy () result, which can be used to strip away your opponent’s defenses, which we’ll explore in more detail below.
Blue dice have the second longest range and are the most accurate. They have no blank faces; the faces that don’t result in hits () or critical hits () result in accuracy ().
Black dice have the shortest range but deal the most damage. While these dice have two blank sides, they also feature multiple sides that combine both hit () and critical hit () results.
The combination of dice that you roll for an attack against an enemy ship’s hull zone depends upon the hull zone from which your attack originates and is indicated on your ship card. If you choose, however, to have your ship perform an attack against one or more squadrons, it uses a different pool of attack dice. Each ship has an anti-squadron armament that is indicated to the right of its hull value on the ship card, and it uses this pool of dice against squadrons, regardless of the hull zone from which it fires.

Though the
Victory II-class Star Destroyer features a primary attack of six dice from its front firing arc, its anti-squadron armament consists of just a single blue attack die.
It’s also worth noting, at this point, that the different versions of your ships may feature different armaments with different combinations of attack dice. For example, the CR90a Corvette attacks out of its foreward hull zone with two red dice and one blue dice, but the CR90b Corvette attacks from the same hull zone with three blue dice.

Two of the CR90a’s attack dice can fire at long range while the CR90b is limited entirely to shots at medium or close range.
As you can see, gaining maximum impact from your attacks is a matter of catching your target within the ideal range and firing arc of your most lethal hull zones. You can further enhance the impact of your attacks by adding dice with the concentrate fire command and spending a concentrate fire command token to reroll any unfavorable result.
Against this, you’ll want to consider the sort of retaliatory fire that your opponent’s ships might be able to send your way. For example an Imperial admiral in command of a badly damaged Victory I-class Star Destroyer might choose to fire at a CR90b Corvette from long range for only three red dice, rather than plot a course to fire at it from close range for three red dice and three black dice.
At that longer range, the Victory I is safely out of range of the Corvette (as illustrated above by the first diagram above). However, at shorter range (as illustrated by the second diagram), the Star Destroyer doubles the impact of its attack, but it also makes itself vulnerable to the three medium-range blue dice from the Corvette’s foreward hull zone. If it doesn’t destroy the Corvette, the Corvette might punch through its final defenses and destroy it.
Reroute Power to the Forward Deflector Shields
Meanwhile, as you batter your opponent’s ships with turbolasers, missiles, and proton torpedoes, your enemy is firing back at you. If you want your ships to survive the battle, you need to make the most of their different defenses.
Your ship’s first defenses are its shields. Each hull zone has a shield value, which indicates how much damage its shields can absorb before they fail.

The shield value (left) and hull value (right) of the
Victory II-class Star Destroyer.
Hits against a hull zone that has lost its shields deal damage to the ship’s hull. Each ship has a hull value listed underneath its title, and if it suffers damage equal to or greater than its hull, it is destroyed.
To prevent your opponent from dealing damage to your hull, then, you need to do more than simply rely upon your shields. Each ship indicates a number of defense tokens that it can use while defending against an attack, and each token allows your ship to perform a different action in response to the attack in order to mitigate its results.
Redirect: When you redirect an attack, you choose one of your hull zones adjacent to the defending hull zone, and you can redirect any amount of the damage dealt to your ship from the defending hull zone to the redirect zone’s remaining shields.
Evade: A ship with an evade token can spend it to cancel one attack die at long range, or to force an opponent to reroll one attack die at medium range. Against attacks made at close range and distance “1,” the evade token has no effect.
Halve Damage: A ship with the halve damage token can spend it to halve the damage from a single attack, rounded up.
These tokens make your defense a matter not only of statistics, but also tactics. Once you use one of these tokens, it is exhausted and turned facedown, displaying its red side. Exhausted tokens aren’t refreshed until the end of the round, so if your ship is exposed to multiple attacks, you need to think carefully about when you want to use one of your defense tokens.

Once used, a readied defense token (green) is exhausted (red).
It is possible to use an exhausted defense token, but doing so removes it from your ship entirely. You no longer have that defensive option available to you each round.
Finally, it’s important to remember that you can use the engineering points you gain from the repair command to repair your ship’s hull or shields. However, you can’t use these points outside of your ship’s activation, so while they may help you recover from the damage you sustain during an attack, they don’t offer you any additional protection during the attack.
Moving into Attack Position
Even though your ships can each perform two attacks in the Ship Phase, those attacks must originate from different hull zones. Since each of your ship’s hull zones has its own firing arc, and none of these firing arcs overlap, your ship will often need to perform its two attacks against different targets.
Click on the above thumbnail to download an example attack from the Armada Learn to Play rulebook (pdf, 443 KB).
Unfortunately, if you direct your attacks against multiple targets, rather than training them all against a single hull zone, the reduction in concentrated firepower may give your foes the time they need to refresh their defense tokens, redirect their shields, repair damage, and brace themselves for multiple additional rounds of combat.
This means that you need to coordinate your attacks as much as possible, both by training the weapons from multiple ships against a single hull zone and by setting courses for your ships that leave them in position to target the same, compromised enemy hull zone with attacks from two of their hull zones.
Of course, this is easier said than done, especially since you and your opponent are always trading activations. In the end, learning how to coordinate your fleet is something of an art form, and if you can concentrate the fire from multiple ships against a single target, you’re well on your way toward destroying that target and defeating your foe.
You Are in Command Now
In Armada, you take on the role of fleet admiral, and it is your job to coordinate the actions of the thousands of men and women under your command. As your ships tremble and groan under the barrage of enemy fire, you are the one who must direct their fire, their defenses, and their movement. Can you deliver the commands that will see your side emerge victorious?
The battles of Armada are massive, and they’re brutal. Moreover, they’re every bit as much about tactics as they are about raw firepower. We’ll continue our exploration of these tactics in our next preview when we take a closer look at how capital ships make use of the game’s unique maneuver tool and how they interact with obstacles!

Star Wars: Armada is an epic two-player game of tactical fleet battles in the Star Wars universe. Massive Star Destroyers fly to battle against Rebel corvettes and frigates. Banks of turbolasers unleash torrential volleys of fire against squadrons of X-wing and TIEs. As Rebel and Imperial fleets collide, it is your job to issue the commands that will decide the course of battle and, ultimately, the fate of the

Friday, September 26, 2014

Star Wars Armada news

Command Your Fleet to Victory
A Preview of STAR WARS (TM): Armada

Star Wars: Armada | Published 26 September 2014

“Deploy the fleet so that nothing gets off that system. You are in command now, Admiral Piett.”
    –Darth Vader
Welcome to our first preview of Star Wars™: Armada!
Armada is an epic, two-player miniatures game of large-scale fleet battles set in the Star Wars universe. The time is the height of the Galactic Civil War. As the Imperial Navy’s Star Destroyers move systematically across the galaxy to impose order and crush those who would oppose the evil Galactic Empire, the Rebel Alliance launches its rag-tag fleet of ships and starfighters on daring raids and surgical strikes. Its aim? Weaken the Empire, blow by blow.
In Armada, you enter this ongoing conflict as a fleet admiral with either the Imperial Navy or Rebel Alliance. Your ships have come upon the enemy. Conflict is imminent. Thousands of crew race to their battle stations, preparing for massive exchanges of turbolaser fire. Thousands will die, but it is your job to command the fleet to victory. You must overcome your foes. You must achieve your objective. There is no room for failure.
Even though Armada is a game of capital ships and starfighter squadrons – with battles on a scale large enough to alter the fate of the galaxy – their outcomes still hinge upon you and your decisions. If you wish to emerge victorious, the first thing you’ll need to do is learn how your ships function in battle. Capital ships aren’t nimble like starfighters. In fact, the larger and more powerful your ships, the more time they take to respond to your commands. You can’t react instantly to threats as they arise. You have to plan for the future.
The Command Stack
You begin each round of Armada by entering the Command Phase and secretly assigning commands to each of your capital ships. To do this, you select one of the game’s four possible commands and lock it into your ship’s command dial. You then place the dial facedown at the bottom of your ship’s command stack.
At the end of the Command Phase, a ship’s command stack must always contain a number of facedown command dials equal to its command value. This means that in the game’s first Command Phase, you build full command stacks for all of your ships, assigning them all a number of commands equal to their command values.

The Nebulon-B escort frigate has a command value of “2,” so the Rebel player assigns two commands to the ship in the first Command Phase.
In the Ship Phase that follows, you and your opponent take turns activating your ships. When you activate a ship, you reveal the top of its command stack, turn the dial faceup and resolve its command or spend the command to gain a matching token. Each command provides a different type of benefit, which we will address in more detail below. For now, it’s just important to note that after you assign commands to your ships in the Command Phase, you reveal one command per ship in the Ship Phase.
As the game progresses, you continue to order new commands in each Command Phase, replacing the command dials that were revealed the previous round. These new commands go facedown on the bottom of the command stack, so when you’re assigning commands, you’re always planning for the future.
The Four Commands
There are four basic commands in Armada. Each command can be resolved for full effect when you reveal your command dial, or it can be spent to assign a command token to your ship.
You can assign a number of command tokens to your ship equal to its command value, though you can’t assign more than a single token for a given type of command. While command tokens can then be spent at any appropriate time, the benefits they grant are less than those you gain from resolving the command directly from the dial.

Navigate

A ship can resolve a navigate command during the Ship Phase, after it attacks and as it begins to determine its course.
Dial: You can increase or decrease your ship’s speed by one, to a maximum of the ship’s top speed or to a minimum of zero. Additionally, you can temporarily increase your ship’s yaw by one click at one maneuver joint (on the maneuver tool).
Token: You can increase or decrease your ship’s speed by one, as above.

The game’s unique maneuver tool. (Product image not final. Pending Licensor approval.)

Squadron

A ship can resolve a squadron command during the Ship Phase, immediately after revealing its command.
Dial: You can immediately activate a number of squadrons at short or medium range equal to your ship’s squadron value. Each squadron activated in this way can both move and perform an attack.
Token: You can activate a single squadron as above.

Repair

A ship can resolve a repair command during the Ship Phase, immediately after revealing its command.
Dial: Gain a number of engineering points equal to your ship’s engineering value. You may then spend these points to repair your ship: 1 point – Move one shield from one of your ship’s hull zones to another hull zone.
2 points – Recover one shield in any one hull zone.
3 points – Discard any one damage card
Token: Gain a number of engineering points equal to half your ship’s engineering value, rounded up. These may be spent as above.

Concentrate Fire

A ship can resolve a concentrate fire command during the Ship Phase, after rolling dice during an attack and before all attack effects have been resolved.
Dial: Immediately add an extra attack die to your attack. The die must match a die type already in the attack pool.
Token: You can reroll any one die in your attack pool.
Notably, you can spend a command token for its benefits at the same time that you resolve the same type of command from your dial. For example, you could reveal the concentrate fire command to enhance your attack, adding an extra attack die to your attack pool. You could then also spend a concentrate fire command token to reroll a blank die during the same attack.

In the Ship Phase, the Rebel player reveals the concentrate fire command for his CR90 corvette. It attacks from its forward arc for two red dice and one blue die. After rolling these dice, the player decides to spend the ship’s concentrate fire command to add a third red die. He rolls a blank, but because the ship happens to have a concentrate fire token, he can spend it to reroll the die. He does, and it generates another two hits!
Alternatively, you could spend a repair token at the same time you reveal a repair command to gain engineering points equal to 150 percent of your engineering value, rounding up any fractions. You can then use these for any combination of repair effects. Since you can’t save any unspent engineering points after resolving a repair command, spending your repair token at the same time you reveal a repair command can open up options not normally available to you. A Victory I-Class Star Destroyer, for instance, could use these repair points to discard two faceup damage cards in a single turn.
Of course, you don’t have to spend your command tokens at the same time you reveal a similar command from the dial. You can spend a command token at any time you could resolve the command from your dial, and if your ship has a high enough command value, you could spend several tokens in a single round, potentially activating a squadron, repairing your shields, and rerolling an attack die – all in the same round that you reveal a navigate command on your dial to adjust your speed and course. In this way, the larger ships can make up for their sluggish responses to your commands with massively impactful rounds. And imagine what such a round can do to the morale of an opponent who has spent the better part of the game battering at your Star Destroyer, only to see it recover the majority of its damage and punch a hole through his CR90 corvette with a single direct hit.
Devising Your Battle Plan
Again, the larger your ship is, and the more that it can do, the more you have to plan ahead. This is also a truth that multiplies as you consider the impact of your commands across the whole of the battlefield: You’re not piloting a single ship, after all; you’re directing the coordinated efforts of an entire fleet.
Your initial commands establish the tone for your early rounds; they might even establish the tone of the entire match. If you find your Star Destroyers are drifting out of position in the early rounds, you can issue a navigate command, but you’ll still know that you’re going to have to spend several rounds doing your best to survive and maintain the semblance of an aggressive stance until you can adjust your speed and course.
Moreover, when you start building larger fleets, your ships may feature an array of command values, and your command stacks may vary a great deal, even among ships with the same command values. If your fleet contains both a Victory II-class Star Destroyer and a Victory I-class Star Destroyer, you might want to position them both to fire upon the same enemy ship within a single round in an effort to blow it out of the skies. However, this plan might require two different command stacks.
Since the Victory II features an armament with both the long and medium range red and blue dice, respectively, you might want it to concentrate fire two rounds in a row. In this case, you can spend the first concentrate fire command to get a token. Then, you resolve the second concentrate fire command directly from the dial. By combining the concentrate fire commands from both the dial and token, you get both the most possible dice and the best possible results.

Aiming for a third-round barrage of fire, the Imperial player assigns the concentrate fire command to his
Victory II-class Star Destroyer for two sequential rounds.
The Victory I replaces the mid-range blue dice with short-range black dice, meaning you’ll need it to draw close to its target in order to unleash its barrage at maximum firepower. Accordingly, you might want to issue it a navigate command the round before it concentrates fire so that it can speed up to be on target.

To unleash its most devastating volley on the third round, the
Victory I has to get closer to its target than the Victory II does, so the Imperial player assigns it a navigate command on the second round, hoping it will be able to get into position before revealing a concentrate fire command on the third round.
By planning ahead – and responding appropriately to your opponent’s actions – you may be able to build toward a single round in which you unleash a single, devastating hail of fire from both ships.
Engaging the Enemy
No battle plan ever fully survives contact with the enemy, and learning how to adapt to the challenges of combat is another massive part of achieving success in Armada. Accordingly, our next preview will offer a closer look at combat. Brace yourself!

Star Wars: Armada is an epic two-player game of tactical fleet battles in the Star Wars universe. Massive Star Destroyers fly to battle against Rebel corvettes and frigates. Banks of turbolasers unleash torrential volleys of fire against squadrons of X-wing and TIEs. As Rebel and Imperial fleets collide, it is your job to issue the commands that will decide the course of battle and, ultimately, the fate of the galaxy.
© & TM Lucasfilm Ltd.

Friday, September 19, 2014

More News on X-COM the boardgame

News for September 2014
Alien Intelligence
A Closer Look at XCOM: The Board Game's Unique Companion App

XCOM: The Board Game | Published 19 September 2014

The signal was already breaking up. UFOs over Europe, Africa, and… The early warning system went offline. Despite the limited intel, there was no time to lose. The Commander deployed the Interceptors, praying they were headed where they were needed most. There was another alert. The systems revealed an invasion force headed for the base, and then… nothing. The signal was dead. The satellite network was down. XCOM would have to fight blind…
The alien invasion has already begun!
The initial response to our announcement of XCOM: The Board Game has been positively overwhelming. Our demo tables were packed at Gen Con Indy, then again at PAX, and fan sites have since set the net abuzz with news and reviews about both the game and its use of a free digital companion app.
Why does XCOM make use of a digital companion, and what does it add to the game? These are the questions we’ll address today, as we launch headlong into the first of our series of previews.
Researching New Technology
In XCOM: The Board Game, one to four players work together as department heads of the elite military organization XCOM. It is up to you and your friends to thwart a full-scale alien invasion. This invasion is controlled by the app.
Our goal was that XCOM’s digital companion app would allow us to create a gameplay experience that would go well beyond what would be feasible without it. Accordingly, it is an integral part of the game and drives your play experience. It controls the alien invasion, coordinates hidden information, adds to the game’s tension, distinguishes player roles, and promotes a fully cooperative experience. Moreover, the app, which is available for free as both a downloadable app and an online tool, teaches you the game, guides you through each turn, and serves as your rules reference, one that is always immediately at hand.

XCOM’s digital app compresses a wealth of information into an easily digestible format. Furthermore, it keeps the game’s rules immediately at hand. You can learn about the active action simply by clicking on it, and the menu button allows you to access the full rules in just two quick clicks.
Coordinating the Alien Invasion
Each round is divided into two phases, the timed phase and the resolution phase. Throughout the timed phase, the app creates alerts that pop up onscreen and indicate which actions the players need to take. You may need to place UFOs on the board, assign scientists to research new technologies, or choose which global crisis your team will address.
Whenever an alert pops up, it is accompanied by a limited window of time within which your team can act.
 
The app alerts your team to an impending crisis.
After the app triggers the last of these real-time alerts in the timed phase, you enter the untimed resolution phase. In the resolution phase, you are no longer pressed by time limitations, but you face new tensions as you roll dice and push your luck to resolve your research, missions, and global defense. Even in the resolution phase, the app guides you through your turn sequence. Then, at the end of the phase, you input the results of your efforts, the app calculates the aliens’ next tactics, and the next timed phase begins.
By handling all the calculations for the alien invasion plan, the app greatly streamlines the game, and by serving as your timer, the app also helps to amplify the game’s tension. However, the app does far more than reduce your setup time and track the progress of each round’s timed phase. Those elements are useful, but they don’t truly indicate how the app characterizes your experience.
Promoting a Fully Cooperative Game Experience
XCOM: The Board Game is a fully cooperative (or solo) gameplay experience, and this is one important element of the gameplay experience that the app enables. XCOM’s app handles all of the hidden information for the aliens, directing the deployment of each round’s UFOs and enemies, as well as the number of crises that you and your team are forced to resolve. These decisions are made semi-randomly, based upon the game’s invasion plan, its difficulty level, and your ability to deal with the invasion from round to round. In fact, the app’s ability to respond to your actions means that XCOM permits an experience that’s more intelligent than a deck of cards, without requiring a player to assume the role of the aliens.
It’s thematically important that the players in XCOM are all working together to save humanity from the onslaught of a strange and unknown alien menace, but it’s also important for the game’s mechanics. The app introduces two innovative game elements that are critical to your XCOM experience: forecasts and scrambled communications.
Forecasts appear during the timed phase, flashing across your screen as yellow transmissions, and they give you advanced warning of the alien invasion plan for the round before UFOs appear in orbit or enemy strike teams arrive at your base. The information that these forecasts provide is almost always accurate, but the fullness of its intelligence depends upon how well you can maintain your satellite network. In fact, if too many aliens remain in orbit, your satellite network will deteriorate to the point where you might lose your forecasts altogether.

An example of how the app can forecast the arrival of UFOs. The forecast on the left indicates the future arrival of four UFOs (marked in yellow): two in orbit, one in Europe, and one in Australia. The alert on the right shows the arrival of three of these UFOs. Because forecasts rarely lie, we can generally expect that the UFO forecasted to arrive in Europe will arrive later in the round.
This brings us to the idea of scrambled transmissions, which contribute to one of the most remarkable aspects of the XCOM experience. In XCOM: The Board Game, the app doesn’t just play the role of your rival, it’s also your “game manager.” It teaches you the rules in its tutorial mode and then continues to serve as your one-touch rules reference. However, it also prompts you to act. In fact, there is no turn sequence listed in a rulebook because the app manages your turns, and while you’ll recognize the basic patterns of your turns – receiving forecasts, deploying resources, tracking alien movements, and responding to global crises – there is no one, single turn sequence.
Instead, the app tracks the order in which events occur and weighs your team’s actions each turn, and if the aliens are outpacing your satellite network, the app will start scrambling your transmissions, forcing you to deploy your Interceptors before you know where the UFOs are appearing in orbit. You may even have to deploy soldiers to your mission and base before you have any idea what the aliens have planned for the turn.

Here, we see an example of how scrambled transmissions can impact your ability to successfully resist the alien invaders. The screenshot on the left depicts the sort of information you should receive while your satellite network is doing its job; we see that our alert history twice detected UFOs before we had to deploy our Interceptors. The screenshot on the right, however, introduces a nightmarish situation; we are forced to deploy our Interceptors near the very beginning of the round, well before we have any idea where the aliens intend to land their UFOs. We are fighting blind.
The Central Officer
 
The Central Officer is responsible for four different aspects of the game. Two of these relate directly to the quality of information that your team receives from the app.
The threat of scrambled transmissions, once again, is another element that adds to the game’s uniquely satisfying cooperative play. XCOM: The Board Game features four asymmetric roles, which players divide between themselves at the beginning of each game. One of these roles is the Central Officer, the XCOM department head responsible to manage both the app and XCOM’s satellite network.
Managing the App
The first of the Central Officer’s listed duties reads:
“Communication – relay information from the app”
At first glance, this duty may appear deceptively straight-forward, but the app isn’t just a digital hourglass. It’s a resource that the Central Officer can manage, and the fact that scrambled transmissions can quickly devastate your efforts means that his role is absolutely vital.
The app has a pause function, and your group has a limited amount of pause time that it can spend each round. This pause time varies according to the game’s difficulty, but it’s also a resource that you can manage carefully in order to ensure that it’s available when you need it most. You can use it to check forecasts or discuss strategies, but if you overuse your pause time, it will run out. Then, you’ll be forced to make your future decisions in shorter windows of time. However, if you complete your earlier, simpler tasks more quickly, the Central Officer can start to bank your pause time for when the invasion hits in full force later in the game.
The fact that the Central Officer controls this pause function means, then, that he’s largely responsible for how much time your group can spend deliberating the merits of different strategic choices. Since each alert opens a limited action window, players can’t spend a long period of time to reach a group consensus about the optimal response, and this means that the multi-player format for XCOM truly encourages each member of the group to carry his or her full weight and focus on a limited set of tasks, rather than trying to manage the whole organization. In turn, the fact that you’re asked to focus so closely on your own tasks and tactics means that you better appreciate your role’s specific challenges, and you gain a greater replay value when you switch roles and tackle another whole set of challenges.
Of course, you’re still a team, and the app’s pause function will let you work together in those moments when you really need to craft your strategies as a group, but the timer and the Central Officer help to ensure that those moments merely punctuate your game experience. They don’t define it.

Your pause time is a variable resource that you will want to manage carefully in order to buy the time you need for your group to reach a consensus during the game’s most critical decisions.
Managing XCOM’s Satellite Network
In addition to managing the app, your Central Officer must also manage XCOM’s network of satellites. He can focus on attacking UFOs in orbit in order to keep your signals strong and your forecasts clear. Or he can jam the invaders’ signals to confuse UFOs hovering over the earth’s continents. When these efforts succeed, the UFOs leave the continents but return to orbit. Of course, once they’re in orbit, those UFOs then threaten to scramble your transmissions. Thus, the Central Officer must constantly weigh the importance of maintaining clear transmissions against the importance of luring alien UFOs away from the Earth.

The more UFOs in orbit, the greater the chance they will scramble your transmissions.
All told, the Central Officer serves your XCOM team as the head of military intelligence, and he’s the member of your group who is most responsible for ensuring that your team can collect the information that you need to formulate a winning plan.
Confronting the Alien Menace
As you can see, the digital companion app for XCOM: The Board Game is an integral part of the game. It streamlines your game experience, coordinates hidden information, serves as your timer, helps to distinguish player roles, and allows you and your friends to enjoy a truly cooperative experience. Additionally, it keeps the game’s rules close at hand, manages your turn sequence, permits variable difficulty levels, and challenges you to maintain a strong satellite network and clear transmissions. Moreover, the app also includes a tutorial that teaches you the game, meaning that you can dive immediately into the action. All in all, this free digital app is far more than a convenient addition to XCOM: The Board Game, it’s the slimy, green, pulsating heart of the alien invasion.
How will you respond to this alien threat? In our upcoming previews, we’ll look at the different roles you can assume as an XCOM department head and the choices with which you’ll have to wrestle as you try to plan your final mission and force the invaders back off our world.